Table of Contents
Introduction
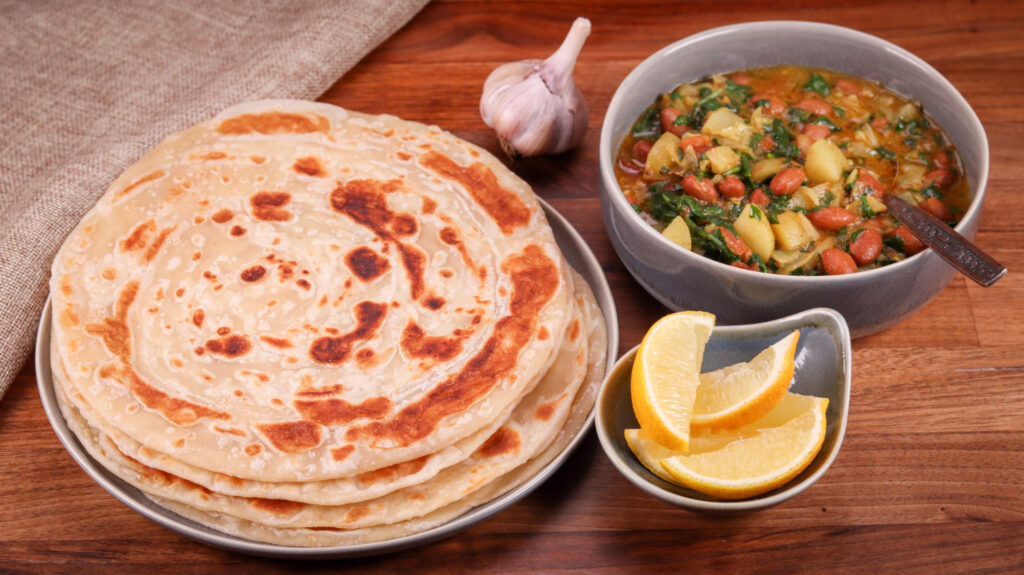
Lachha paratha, a beloved delicacy from the rich tapestry of Indian cuisine, has gained enormous popularity both within and beyond the country’s borders. This flaky, layered bread exemplifies the culinary mastery and artistic craftsmanship ingrained in Indian cooking traditions.
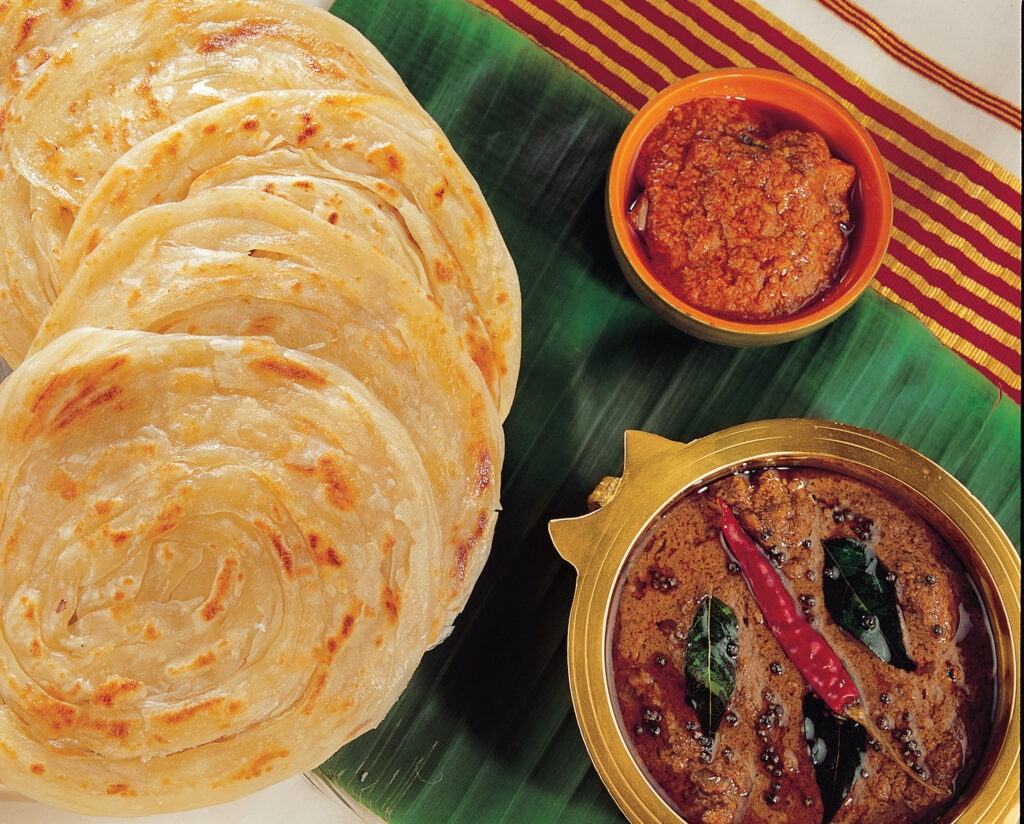
Consider a warm, golden-brown paratha that has been delicately folded into numerous layers, creating a tantalising visual feast. The crust crackles as you take your first bite, giving way to a soft, melt-in-your-mouth interior. The aroma of roasted wheat fills the air, accompanied by subtle hints of ghee and spices. Lachha paratha exemplifies the harmonious blend of textures and flavours that characterises Indian cuisine.
The delectability of lachha paratha lies not only in its appealing appearance, but also in the skill required to achieve the perfect balance of crispness and tenderness. In this blog post, we will go on a culinary adventure to deconstruct the art of making lachha paratha. Prepare to learn the secrets of this culinary masterpiece as we delve into its preparation, techniques, and the pleasure of savouring each delicate layer. Let us explore the world of lachha paratha and discover the magic it contains.
Understanding the Ingredients of Lachha Paratha
To create the perfect lachha paratha, you will need the following ingredients:
- Whole Wheat Flour: This forms the base of the paratha, providing structure and texture. Whole wheat flour adds a nutty flavor and enhances the nutritional value of the dish.
- Water: Essential for hydrating the dough and bringing the ingredients together. The amount of water needed may vary depending on the quality of the flour, so adjust accordingly.
- Ghee or Oil: Used during the preparation and cooking process, ghee or oil adds richness and flavor to the paratha. It also helps in achieving the desired crispness.
- Salt: Enhances the overall taste of the paratha and balances the flavors. It is a crucial ingredient that shouldn’t be overlooked.
- Optional Spices: While not essential, you can add spices like ajwain (carom seeds) or kalonji (nigella seeds) to infuse additional flavors into the paratha.
Each ingredient plays a vital role in achieving the desired texture and flavor of lachha paratha:
- Whole Wheat Flour: Using whole wheat flour ensures a wholesome and nutty taste, along with a slightly chewy texture. It provides a robust base that holds the layers together, making the paratha sturdy yet delicate.
- Water: The right amount of water is crucial for attaining the desired dough consistency. It binds the ingredients together, allowing the dough to develop elasticity and flexibility, making it easier to roll and create the layers.
- Ghee or Oil: Adding ghee or oil during the preparation and cooking process helps in achieving the flaky layers and imparting a rich, buttery flavor. It also prevents the layers from sticking together while cooking, resulting in a crisp yet tender paratha.
- Salt: Salt not only enhances the taste but also affects the gluten development in the dough. It helps in achieving the right texture and ensures that the flavors are well-balanced.
- Optional Spices: Ajwain or kalonji seeds can elevate the flavor profile of lachha paratha. Ajwain adds a subtle earthy aroma, while kalonji imparts a distinct, slightly bitter taste. These spices lend an additional depth to the paratha, making it even more tantalizing to the taste buds.
Understanding each ingredient’s role allows us to appreciate the delicate balance required to make a delicious lachha paratha. Now that we’ve become acquainted with the ingredients, let’s move on to the process of preparing the dough and creating those lovely layers.
Preparing the Dough of Lachha Paratha
Follow these step-by-step instructions to prepare the dough for lachha paratha:
- Combine whole wheat flour and salt in a mixing bowl. Mix them thoroughly to evenly distribute the salt.
- While continuously mixing the flour, gradually add water. To achieve the desired dough consistency, add the water in small increments. Soft, pliable, and slightly sticky dough is ideal.
- When the dough begins to come together, place it on a clean, lightly floured surface or countertop.
- Knead the dough for 5-7 minutes, or until it is smooth and elastic. Push the dough away from you with the heel of your palm, then fold it back and repeat the process. This aids in the development of the gluten, which gives the paratha its desired texture.
- If the dough is too dry, add a little water; if it is too sticky, add some flour. While kneading, adjust the consistency as needed.
- Once the dough is smooth and elastic, brush it with a small amount of ghee or oil to keep it from drying out. Allow the dough to rest for at least 15-20 minutes, covered with a clean kitchen towel or plastic wrap. This resting period allows the gluten to relax and softens the dough.
Here are some tips to achieve the desired elasticity while kneading the dough:
- Take your time: Kneading is an important step in developing the gluten strands that give the paratha its structure and chewiness. Allow the dough to become smooth and elastic by kneading it thoroughly.
- Gradually add water: To control the consistency of the dough, add water in small increments. When you add too much water at once, the dough becomes sticky and difficult to work with. Make any necessary adjustments to achieve a soft, slightly sticky dough.
- Use the proper technique: Push the dough away from you with the heel of your palm, then fold it back towards you. Rep this process, applying gentle pressure each time, until the dough is pliable and smooth. This technique aids in the even development of gluten strands.
- Adjust the flour or water: If the dough is too dry and crumbly, add a little water and knead it again. If it feels too sticky, add a pinch of flour. The goal is to have a soft, supple dough that is slightly tacky to the touch.
- Resting time: It is critical to allow the dough to rest after kneading. It relaxes the gluten and makes it easier to roll out and shape the dough into layers. Cover the dough to prevent it from drying out during the resting period.
The art of kneading dough lays the groundwork for making the perfect lachha paratha. Let’s move on to the next exciting step, the layering technique that gives lachha paratha its distinct flakiness.
Layering Technique of Lachha Paratha
Rolling and folding the dough to create multiple layers is the traditional method of layering lachha paratha. To achieve the characteristic flaky texture, this technique requires precision and patience. Follow these steps to create the flaky layers of lachha paratha:
- Shape a small portion of the rested dough into a smooth ball. To keep it from sticking, dust it with flour.
- Using a rolling pin, roll out the dough ball into a thin, round circle. A diameter of 6-8 inches is ideal.
- Evenly spread a thin layer of ghee or oil over the rolled-out circle.
- Lightly sprinkle flour over the oiled surface. This will help you create the layers.
- Starting from one end, make small, evenly spaced pleats or folds along the length of the rolled-out dough. Press each pleat gently to seal it in place.
- Begin at one end and work your way down the length of the rolled-out dough, making small, evenly spaced pleats or folds. Gently press each pleat to secure it in place.
- After making all of the pleats, gently roll the pleated dough into a spiral or coil, tucking the end underneath.
- Gently press down on the spiral to secure the layers together. Flour the spiral and carefully roll it out into a round circle. Maintain the layers by rolling gently.
- Repeat the ghee or oil application, flour sprinkling, pleating, and spiral rolling process. This results in multiple layers of paratha.
- Finally, roll out the layered spiral into a circular shape, making sure the layers are distributed evenly. A thickness of 1/8 to 1/4 inch is ideal.
Alternative Methods and Variations for Layering Lachha Paratha:
- Triangle Folding: Instead of pleating the dough along its length, fold it into a triangle shape. Roll the dough into a circle, then cut it into triangles, folding each triangle into layers.
- Cone Rolling: Once the dough has been rolled into a thin circle, make a small cut from the centre to the edge. Roll the dough into a cone shape from one end, creating layers as you go. Flatten the cone and reroll it into a circle.
- Stuffed Lachha Paratha: For a twist, sandwich a flavorful stuffing between the layers. Spiced mashed potatoes (aloo paratha), paneer (Indian cottage cheese), and minced meat are popular fillings. Simply place the filling on one layer, cover with another layer, and seal the edges before rolling out the paratha.
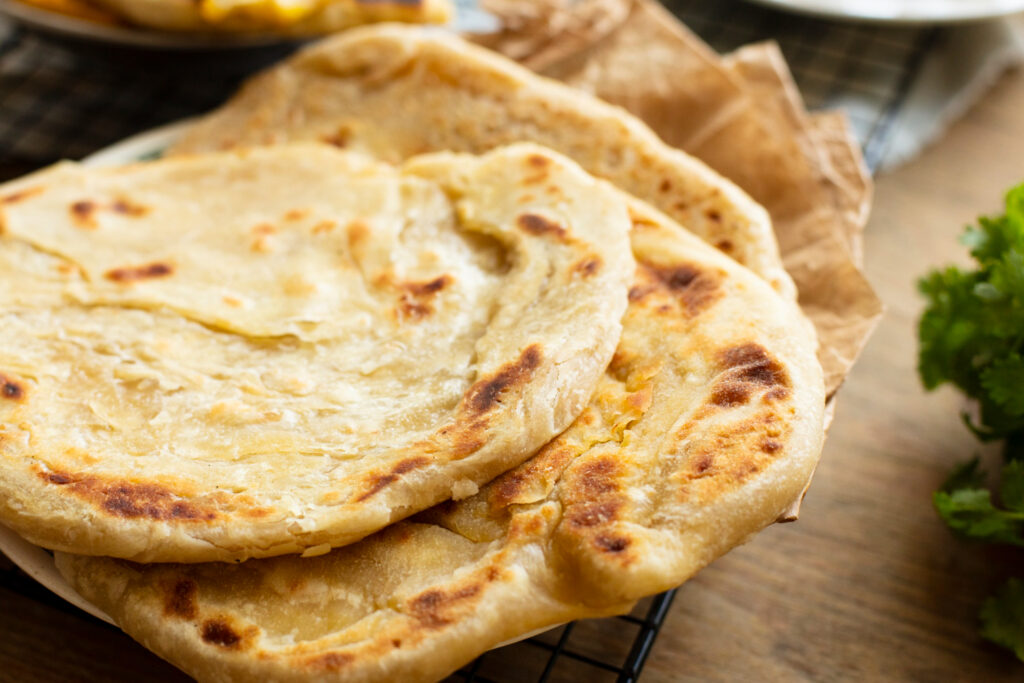
Experimenting with different layering techniques and variations gives your lachha paratha preparation a creative edge. These techniques ensure that every bite of paratha is a delight, revealing the hidden layers within. After the layers have been formed, it is time to begin the cooking process and bring these flaky parathas to life.
Cooking Lachha Paratha
Lachha parathas can be cooked using various methods, each offering its unique touch. Here are three common cooking methods:
- Tawa or Griddle: This is the traditional method that most Indian households use. Preheat a griddle or tawa over medium-high heat. Place the rolled-out paratha on the hot surface for a minute or two, or until small bubbles appear. Cook the other side of the paratha with gentle pressure from a spatula. Brush both sides with ghee or oil while cooking to enhance flavour and achieve a crispy texture.
- Oven: Preheat the oven to a high setting, approximately 450°F (230°C). Place the rolled-out paratha on a baking sheet or pizza stone and bake for 2-3 minutes per side, or until golden brown. Brush both sides with ghee or oil before baking to enhance the flavour.
- Stovetop and Direct Flame: This method gives the paratha a smoky, charred flavour. Cook the paratha for 30 seconds on each side on a preheated tawa or griddle until it puffs up slightly. Then, using tongs, place the paratha over a low flame for a few seconds, until it chars and develops a smoky flavour.
Tips for achieving the perfect level of crispness and fluffiness:
- Rolling Thickness: Roll out the paratha to a thickness of 1/8 to 1/4 inch. Thicker parathas may not cook properly, whereas thinner parathas may become overly crispy or dry.
- Oil or Ghee: While cooking, brush the paratha with ghee or oil to achieve a crispy and flavorful crust. Apply it liberally, making sure to coat each layer.
- Gentle Pressure: Apply gentle pressure with a spatula while cooking on a tawa or griddle to ensure even cooking and puffing of the paratha.
- Cook on Medium-High Heat: Maintain the appropriate heat level to achieve the ideal balance of crispness and fluffiness. Too little heat can make the paratha doughy, while too much heat can burn the outside without properly cooking the inside.
Health Benefits and Nutritional Value
Lachha paratha offers several nutritional benefits, thanks to its ingredients and cooking methods:
- Carbohydrates: Lachha paratha is made primarily with whole wheat flour, which is high in complex carbohydrates. These carbohydrates provide a steady release of energy, keeping you satisfied and fueling your body throughout the day.
- Proteins: Whole wheat flour also has a high protein content, which is necessary for muscle growth, repair, and overall body function. Pairing lachha paratha with protein-rich accompaniments like yoghurt, lentils, or paneer can boost its protein content even more.
- Dietary Fiber: Whole wheat flour, which is used in lachha paratha, is high in dietary fibre, which aids digestion, promotes bowel regularity, and helps keep cholesterol levels healthy.
- Micronutrients: Lachha paratha contains important micronutrients such as iron, magnesium, and B vitamins, which are necessary for overall health and vitality.
While lachha paratha offers nutritional benefits, it’s essential to be mindful of certain health concerns and make healthier choices:
- Portion Control: Lachha paratha, like any bread, is high in calories. Be mindful of portion sizes and avoid overeating, especially if you’re watching your calorie intake or trying to lose weight.
- Cooking Methods: Instead of deep frying, use healthier cooking methods such as griddling with little oil or baking. This reduces the overall fat content without sacrificing flavour.
- Whole Wheat Flour: To retain the nutritional benefits, use whole wheat flour rather than refined flour (maida). When compared to refined flour, whole wheat flour contains more fibre, vitamins, and minerals.
- Accompaniments: To add vitamins, minerals, and fibre to your meal, pair lachha paratha with nutritious accompaniments such as vegetable curries, lentils, yoghurt, or fresh salads.
- Homemade Preparation: To have control over the quality and quantity of ingredients, make lachha paratha at home. To reduce added fats, avoid using too much ghee or oil during the cooking process.
Lachha paratha can be a part of a balanced and nutritious diet if you make wise choices. It provides energy and essential nutrients, and can be consumed in moderation as a tasty addition to your meals.